
Plumeria stem problems need a location and a history before they need a treatment. A wrinkled cutting, a collapsing base and a broken branch are different situations. Start by checking what is changing and where the damage begins.
Do not puncture the stem to look for white sap or cut a healthy branch just to check its color. Those tests create wounds without proving that the roots work or the plant is free of disease. A gentle external inspection is a better first step.
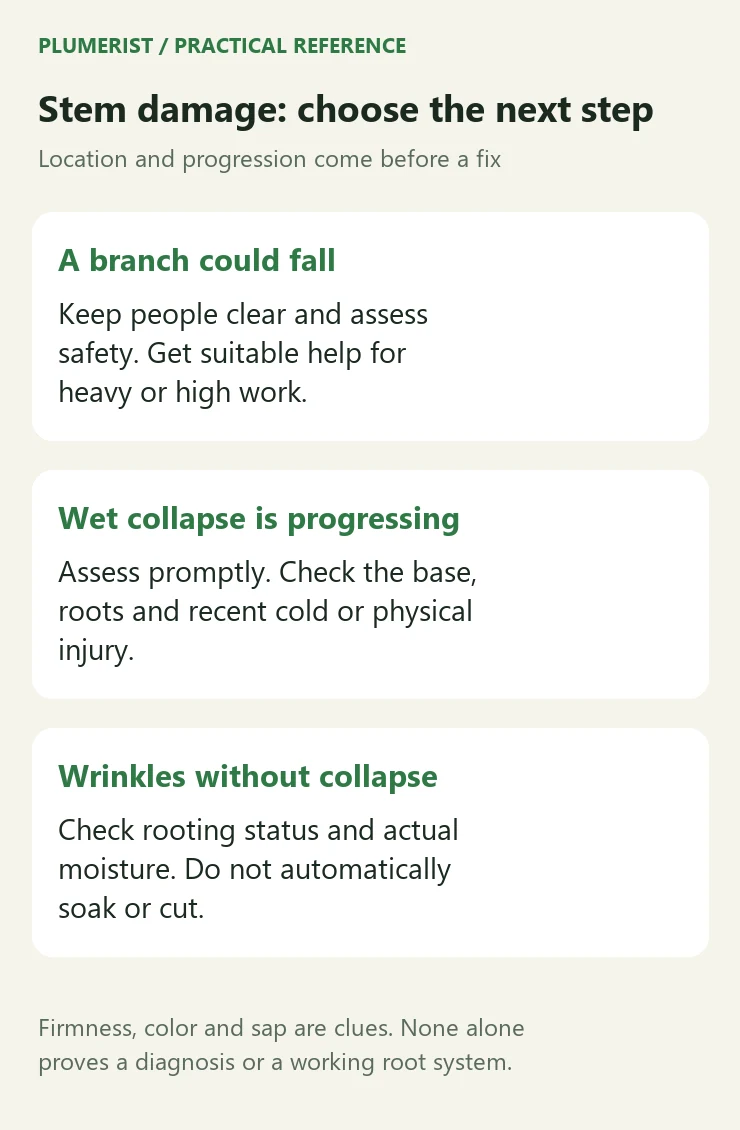
Sort plumeria stem problems by urgency
| Observation | Initial priority | Next useful check |
|---|---|---|
| Hanging, cracked or unstable branch | Keep people clear and assess physical safety. | Branch weight, support and whether professional removal is needed. |
| Wet collapse or a widening soft lesion | Prompt assessment of damage and possible decay. | Where it starts, how quickly it changes and the root environment. |
| Wrinkles without active collapse | Check water balance and rooting status. | Actual roots, medium moisture and recent storage or handling. |
| White tufts or attached shields | Identify what is on the surface. | Bodies, wax and the pattern under magnification. |
| Old scars or stable surface changes | Document and compare before intervening. | Progression, nearby tissue and continued growth. |
This table helps choose the next investigation; it is not a diagnosis. A symptom can fit several causes. More than one problem can affect the same branch.
Begin with a gentle whole plant inspection
- Look at the base, soil line, branch junctions and tips without moving a heavy plant unsafely.
- Photograph the affected area and the whole plant.
- Record cold, heat, falls, pruning, recent purchases and changes in watering.
- Check moisture in the occupied root zone, not just the surface.
- Compare the affected area with nearby tissue using only gentle pressure.
- Watch whether the boundary stays stable or expands.
A hard squeeze can bruise succulent tissue. Repeatedly bending a branch can break it. Avoid turning an uncertain symptom into a new injury.
A moisture meter reading is one observation about the medium. It does not prove that a stem is alive or tell you whether a pathogen is present. A dry upper layer can also hide wetter conditions below.
Softness at the base: investigate roots and the collar
A deteriorating base deserves prompt attention, particularly when tissue is wet, dark or collapsing. Inspect drainage and the surrounding medium. Do not simply add water because the canopy looks thirsty.
UC IPM’s root, stem and crown rot reference describes decayed tissue and the role of root conditions in these diseases. Similar external symptoms do not identify the organism involved. A firm upper branch does not establish that the roots below it are sound.
Careful root inspection may be justified when decline and persistent wetness support that investigation. It is not a reason to unpot every plant with a small wrinkle. Large plants may require experienced help to inspect safely.
The root and collar assessment separates the parts of the plant involved. Follow that distinction before choosing a rescue approach. No generic potting mix can reverse tissue that has already died.
Wrinkles and a yielding stem do not settle the cause
A stem can lose stored water while a cutting waits to root. An established plant can also struggle to take up water when its roots are damaged. Those conditions can require very different responses.
For a cutting, check when it was taken, how it was stored and whether roots have actually developed. New leaves or flowers alone do not answer the root question. Avoid automatically soaking a declining cutting.
Use the wrinkled cutting guide for that specific situation. The broader soft stem guide addresses softness as a symptom. Neither a wrinkle nor a gentle squeeze is a pathogen test.
For a rooted plant, compare actual moisture with its growth and exposure. Do not follow an old summer schedule after substantial leaf loss or cold damage. The watering reference by growth stage supplies the same framework used throughout the care guides.
Dark tips and damaged bark need context
A dark tip can follow cold, pest injury, drying or disease. Its color is not a signature that establishes “black tip fungus.” Record whether the area is dry and stable or becoming soft and progressively larger.
Inspect nearby leaves and protected junctions for mites and other pests. Some injury is easier to interpret with magnification. Do not cut every dark growth point on the assumption that all darkening spreads internally.
UC IPM’s sunburn reference explains that bark injury can resemble other disorders. Review recent exposure changes, especially after storage or a move. A suddenly exposed stem can be injured even when part of the canopy remains shaded.
After freezing weather, distinguish uncertain damage from active wet collapse and a dangerous limb. The freeze pruning decision guide covers those differences. Waiting for clearer survival boundaries is not an instruction to ignore worsening decay.
Surface bumps, scars and white material
Old leaf attachment scars and changes in older bark can look different from young green stems. A stable surface feature alone is not a reason to cut. Equally, roughness does not guarantee that everything underneath is healthy.
Inspect a white patch for waxy bodies, shields, dried residue or a recent wound. Fixed insects may not move when you look at them. Do not gouge the bark to make them reveal themselves.
The white marking comparison explains surface material versus damaged tissue. Some of those checks apply to stems too. Keep the actual location in your notes rather than assuming a leaf and trunk symptom are identical.
Plumeria releases milky sap when injured. Keep it away from eyes and skin. New sap at a known break needs different context from persistent unexplained exudate beside deteriorating tissue.
Holes, debris and broken branches
A small hole does not by itself prove an active stem borer. Check for associated debris, repeated fresh activity and internal damage that is already exposed. Do not probe deep into the branch to search for a larva.
If borer damage is suspected, document the insect or debris and seek local identification. Location matters because pest ranges differ. Spraying an unidentified hole does not establish control of an insect feeding inside wood.
For a broken branch, assess the load and fall risk before tidying the wound. Large overhead work needs suitable professional help. Do not rely on brittle branches as handholds or ladder supports.
Wisconsin’s plumeria overview describes the plant’s succulent, brittle branches and irritating sap. Those characteristics matter during inspection and cutting. Protect yourself and support any accessible piece being removed.
When cutting is justified
Confirmed deterioration or a hazardous break may require removal. Use a sharp suitable tool and clean it between suspect cuts or plants. The aim is to remove affected material while preserving useful structure.
There is no reliable universal extra inch, two clean cuts rule or sap color test that guarantees success. If the damage reaches the trunk or its boundary is unclear, get experienced diagnostic help. Repeated exploratory cutting can leave little viable material.
Do not make paint, caulk, lime paste or kitchen powder the default wound treatment. Keep unnecessary moisture off a fresh cut and monitor the remaining tissue. A coating does not correct a failed root system.
Keep the investigation useful
Record the boundary and any action taken. Check new growth, remaining stability and the drying pattern. An old scar becoming dry is encouraging context, but it is not a guarantee of full recovery.
For recurring plumeria stem problems, review the complete setup rather than replacing one rescue product with another. The ongoing care guide connects root conditions, light and seasonal activity. Good care reduces avoidable stress without promising that every injured plant can be saved.
Stem assessment questions
Can plumeria stem problems be diagnosed from firmness alone?
No. Firmness is a clue to combine with progression, exposure and root condition. Neither a firm tip nor a soft patch gives a complete diagnosis.
Do plumeria stem problems always begin with overwatering?
No. Cold, heat, pests, physical injury and water deficit can also affect stems. Establish the pattern before blaming one care decision.
Should I cut a branch to check whether it is alive?
Not as a routine first test. Start with observation and the plant’s history. Use necessary cutting as part of a justified treatment or safety decision.
The Plumerist toolkit
The gear we would buy if we were starting over.
As an Amazon Associate, Plumerist earns from qualifying purchases.